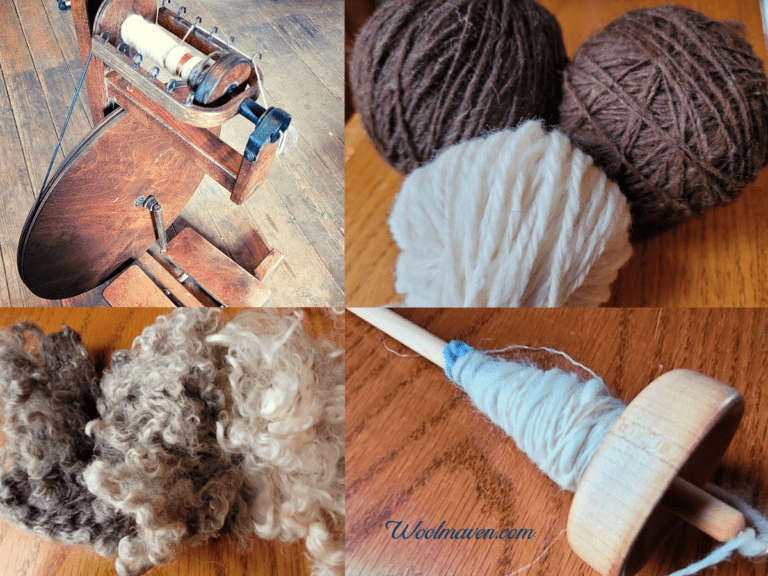
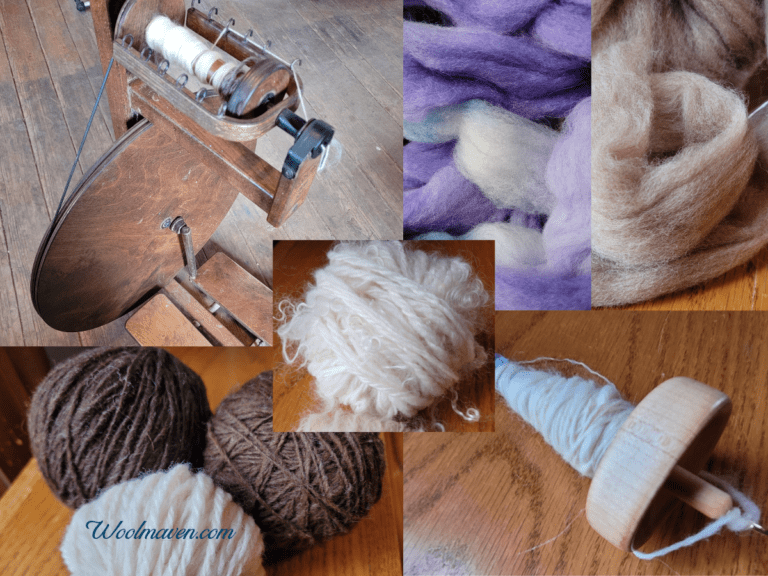
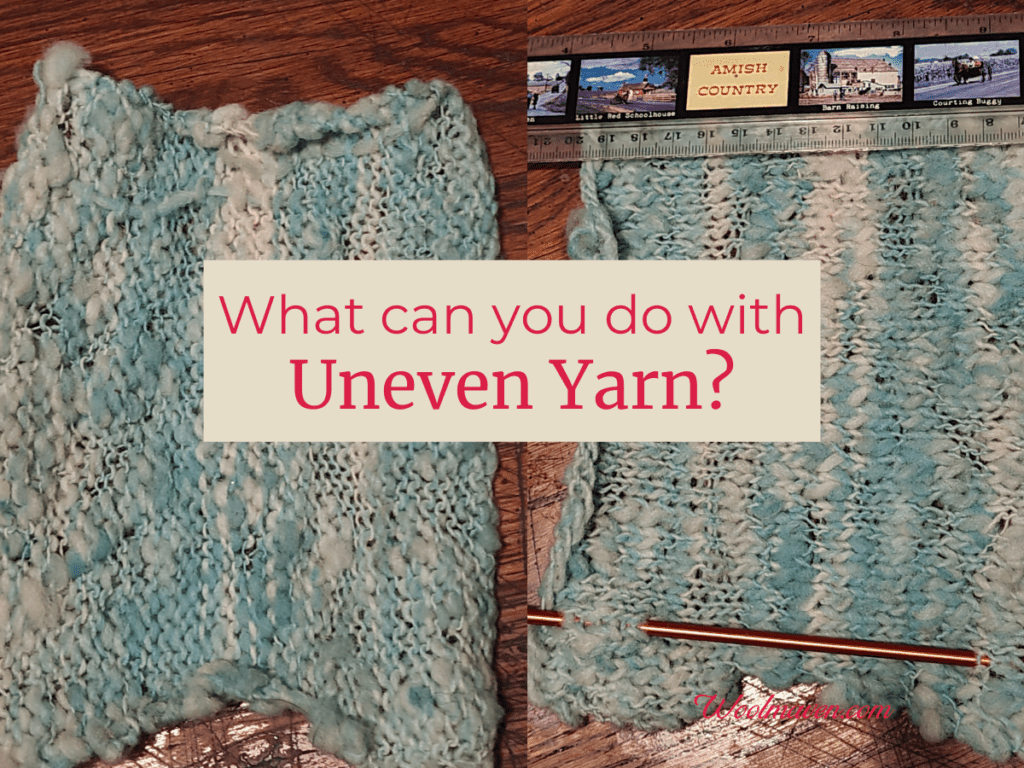
5 Things To Do With Uneven Yarn (& tips to prevent it!)
When you are a beginning handspinner or just trying out something new and things don’t quite go as planned, you can get some uneven spots in your handspun yarns.
What are your options when this happens? Is there anything that you can do with your uneven yarns other than toss them?
Uneven yarns can be plyed, used as a double strand, used without the uneven sections or put in simple projects that highlight the variability of the uneven yarn.
Unevenness in yarns can be reduced by using well prepared fiber, pre drafting or splitting the roving before you start spinning, treadling slowly at the first sign of a problem and wet finishing your yarn.
New to spinning and want some help? Try my Beginning Spinner Course, it has simple, step by step instructions and is designed to take you from beginner to confident spinner!
I like to experiment with interesting spinning techniques and new to me wools, so my hand spun yarns don’t always turn out the way I had hoped!
Not to mention the crazyville yarns I would make when I was just getting started! I still make my fair share of uneven yarns, here are some of the ways I use it.
Is Spinning Your Own Yarn Worth It? goes over the costs and benefits of spinning compared to buying your project yarns.
Use uneven yarn in a simple project
Best for: yarns that are uneven for the entire length
The easiest thing to do with uneven yarn is to use it in a simple knitted or crochet project, since the uneven sections will add interest to the project.
The uneven spots make something simple, like a small square dishcloth look interesting without any pattern. Just knit and it automatically has interest built in.
This is what I do with any new to me wool or technique, since you never really know how you’ll like the yarn you made until you see it in a finished project.
I am constantly surprised at how a not so great looking yarn made a neat little coaster or dish cloth, once I gave it a chance and made something with it.
I have to admit, I like this idea for the really uneven yarns, not just the yarns that have the occasional off section, which we’ll go over below.
Spotlight the uneven yarn
Best for: yarns that are uneven for the entire length
Another option for a super uneven yarn is to spotlight the uneven aspect as a highlight to a hat or scarf.
This means keeping the yarn around until you get more consistent with your spinning or just starting a project and being proud of your journey.
Make a swatch blanket where you put one knitted or crocheted piece of each new to you spinning technique or fiber.
As crazy of an idea as it is now, you’ll be glad you have these pieces to look back on and see how much you have improved.
My most recent uneven yarn
I was testing out a dye that I had from ages ago and I wanted to do a small test dye batch to see if it would still work.
For my test I used some of a fleece I had sitting around that I really don’t care to much for, it’s just okay.
The dye worked just fine, but the fleece was dyed without carding first and was a mess to card, so a mess to spin.
I ended up being frustrated with trying to spin a finer gauge yarn that kept getting lumps, so I went the other way and made a lumpy yarn with fluffed spots on purpose.
This yarn turned out pretty cute when knitted into a dish cloth and, while it was not what I wanted, it is an interesting yarn.
Ply uneven yarn
Use for: occasional or full length unevenness
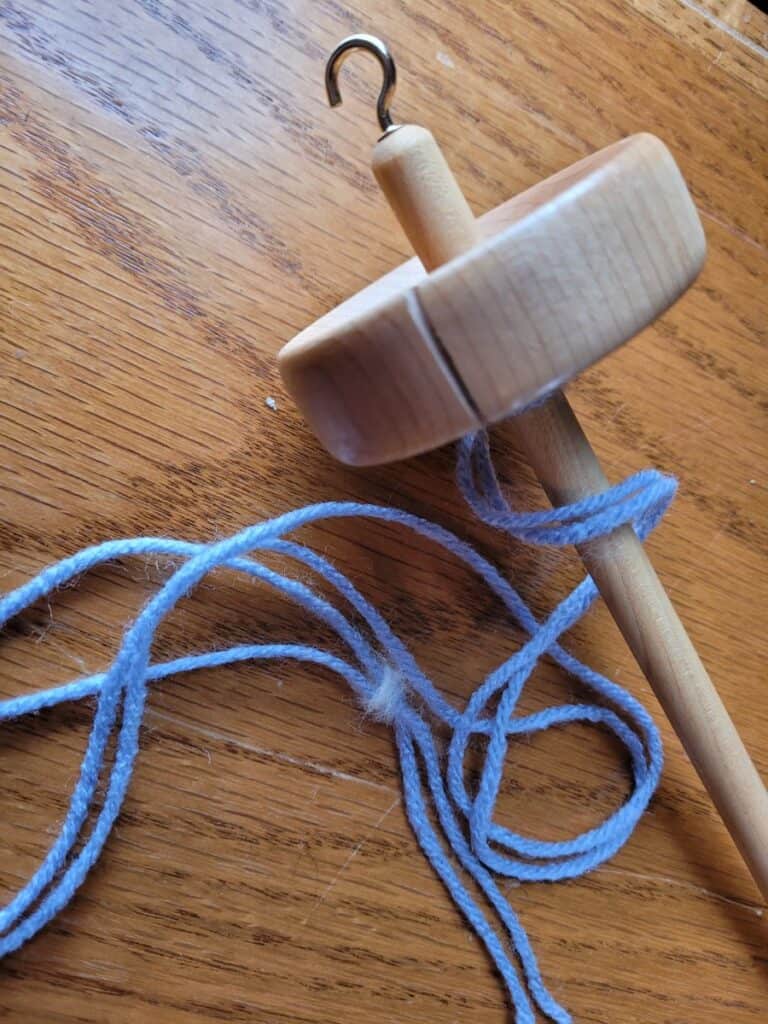
You can try plying your unevenly spun yarn and see how it goes.
This yarn could be matched up with a similar or contrasting color, or plyed with something totally different, like metallic thread, to make more of an art yarn.
Sadly, some of the less well spun sections will probably come apart, but the rest may surprise you.
Have you considered chain plying your yarn?
I get a kick out of chain plying and find it to be very forgiving when part of the yarn breaks, I can grab the end and stuff it back into the twist and keep going.
So far, anytime I have had a yarn break while doing normal two ply plying, it has been a bit of a mess to get fixed. It’s a ton easier when chain plying.
New to spinning and want some help? Try my Beginning Spinner Course, it has simple, step by step instructions and is designed to take you from beginner to confident spinner!
Take out the uneven spots
Best for: yarns that have few uneven sections
If your uneven sections are minimal, meaning most of your yarn looks good to you, why not take out the uneven parts that are driving you crazy?
There is nothing wrong with breaking the yarn, scooting it over and resuming your knitting or crochet, just like you have to do when your ball of yarn dwindles.
This will be more useful for a yarn that just has the occasional uneven spot but the majority of the skein is acceptable to you.
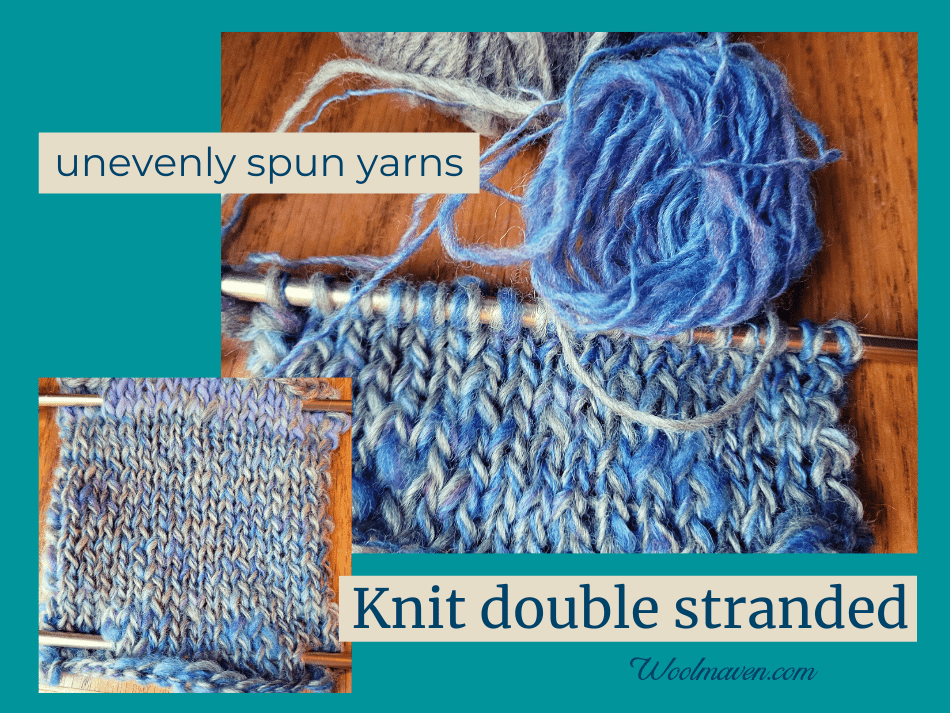
Double up uneven yarn
Use for: occasional unevenness or unevenness throughout the length of the yarn
Another common way I use uneven yarn is to double it up.
Most of the time the uneven spots do not match up when you are using two strands, meaning the thin spots don’t line up with other thin spots.
Sadly, sometimes the uneven spots do line up and that’s just the way it goes! Either cut one of them out and scoot the yarn over or decide that you like the look!
This post contains affiliate links, which means I receive commissions if you choose to purchase through links I provide (at no extra cost to you).
Preventing unevenly spun yarn
You can do a few things before you spin to increase your likelihood of spinning a consistent and even yarn.
Use well prepared fiber
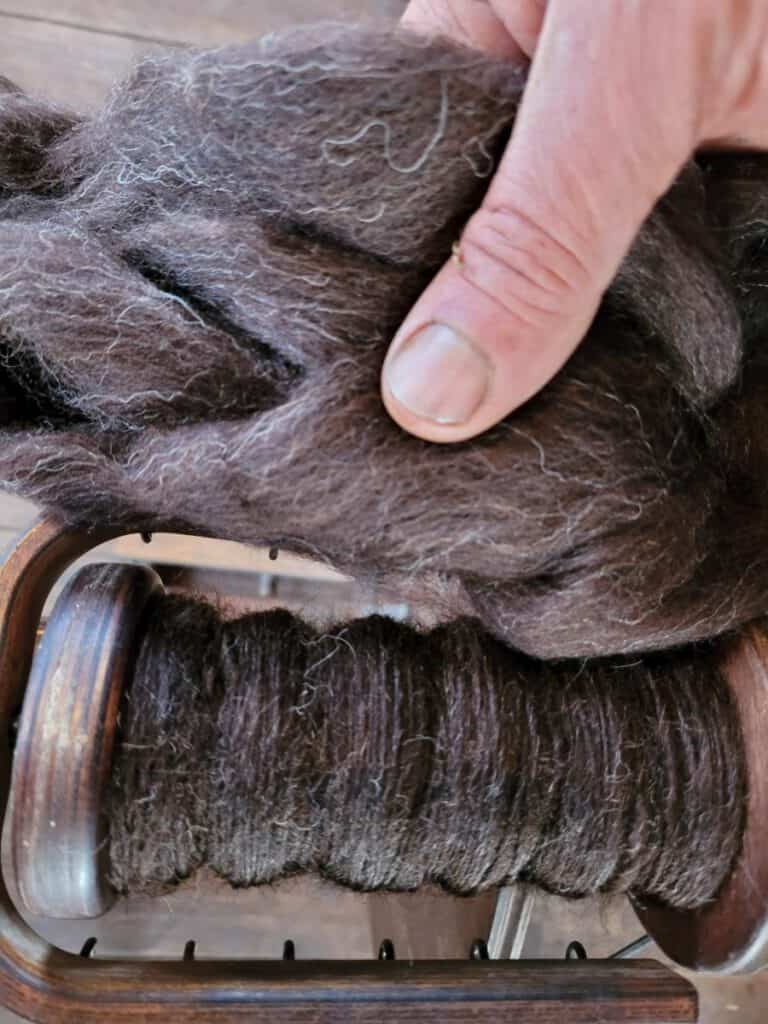
Start your handspinning with well prepared fiber.
I get my bulk spinning wool from The Woolery, this link takes you to their protein fibers page. They have a great selection, fast shipping and good prices. Check them out if you are looking for a fiber source!
If you are having trouble learning to spin and you are carding or combing your own fiber, stop driving yourself crazy and buy some combed top to learn with!
This was my mistake when I was learning to spin. I used wool from our own sheep, meaning I washed and carded the fiber then used it to learn to spin.
My yarns were terrible, a lumpy, bumpy, thin and thick spots mess.
This was partly because I was new and partly because I was new to carding and not very good at it, yet! I was nowhere near as thorough of a carder as I needed to be. Thankfully, I’ve gotten a ton better!
The hand cards that I use are Clemes & Clemes Curved Back Wool Cards. I’ve had them for almost 20 years and use them for all of my hand carding.
These cards didn’t utter one complaint when I was terrible at carding and now are still helping me with my wool projects all these years later.
Sadly, our sheep do not have very handspinner friendly wool, it’s too short, which meant I was breaking the yarn all of the time as I was learning to draft.
I “adjusted for” this by making what amounts to rope because it was thick enough to hold together, but, wow, was it heavy for yarn! Not good.
I look back and can laugh at all this now, but at the time it was not all that funny and made learning to spin harder than it needed to be.
Start with purchased fiber, specifically combed top, and use it exclusively until you are comfortable with the wheel, then move to working with your home grown or home prepared wool.
If you are a new handspinner, read Best Wool To Spin For Your Project for tips on sourcing wools that you will enjoy working with.
Pre draft or split your roving
Have your fiber at a thinness that works for you before you even sit down to spin. Pre draft out the roving or just split it into smaller, more manageable sections.
This will give you less drafting (pulling out the fiber) to do as you are spinning and, at least for me, results in a much more consistent yarn.
I prefer to split the roving rather than pre draft it, splitting just works better for me and gives me more options since I can split as many times as I want to.
Most roving I will split at least once, but some I have split into as many as eight sections.
The roving I split into eight was a pindrafted alpaca and wool blend that I was having a hard time, you guessed it, drafting, so the yarn was way to chubby.
Once I got the splits down to a thin enough sliver, spinning went much better. Any commercially prepared fiber that I have purchased has been easy to split, so no worries on that front!
Treadle slowly!
For me, anytime I am having trouble I, without thinking, tend to speed my treadling. Which is exactly the opposite of what I should do!
If you are having trouble with uneven yarn, make sure you are not speeding away with your feet, slow down your treadling and give your hands a chance to work.
New to spinning and want some help? Try my Beginning Spinner Course, it has simple, step by step instructions and is designed to take you from beginner to confident spinner!
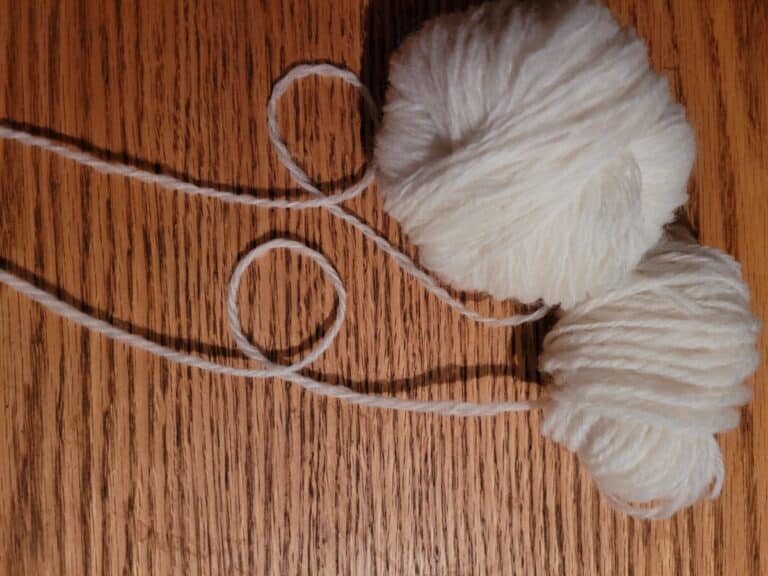
Test spin
Consider test spinning more often, if you don’t test spin at all, now is the time to start!
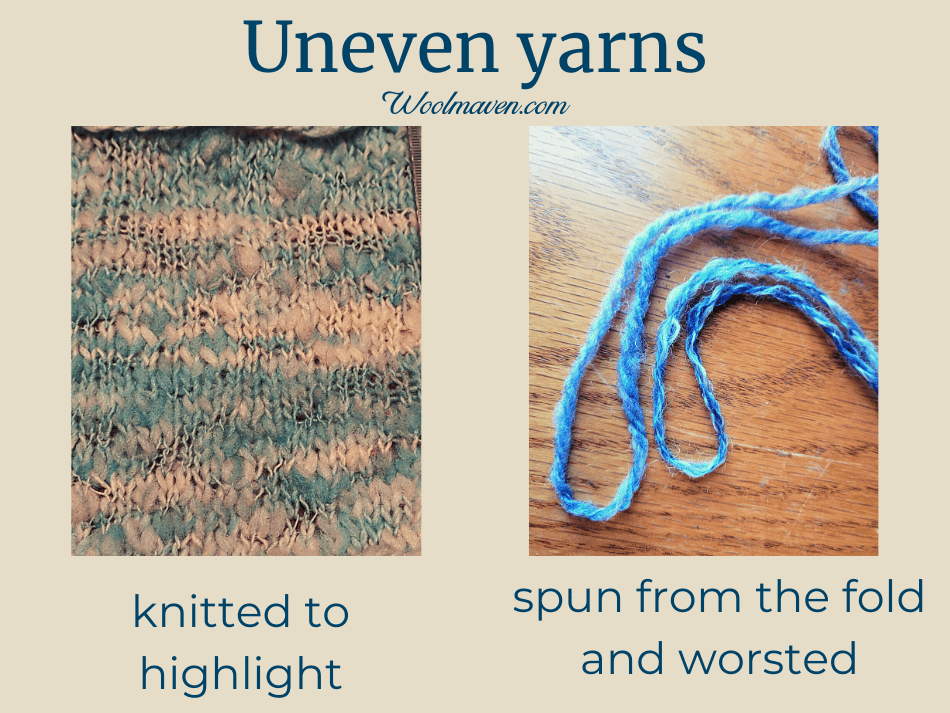
Take a look at the picture above, specifically the right side with the two blue yarns. One is spun worsted and one is spun over the fold (top yarn).
I did my best to spin them the same other than that and look at what a difference it made! The over the fold yarn is more full and even.
When spinning, both yarns felt like spinning was going well and looked equally as good on the bobbin, it was just when dry that the big differences could be seen.
I’m not, at least so far, a big over the fold fan, but it clearly worked great in this situation, which I only knew about since I did some testing at the start.
Wet finish your handspun yarn
The final way to help prevent yarn craziness is to wet finish your handspun yarn. You can thwack it and wet finish it or just wet finish it.
Wet finishing means to soak it in a skein in lukewarm water for 30 minutes or so then let it dry hanging and weighted.
Thwacking is whapping the damp skein on the side of the tub or counter after it has soaked but before you have hung it to dry.
Thwacking lets the fibers rearrange a bit and gives your yarn a little bit of a poof. Make sure you turn the skein and whap it multiple times to thwack all of it.
If you want more details on wet finishing your yarn, read Finishing Your Handspun Yarn by Sierra Roberts of Halcyon Yarn.